
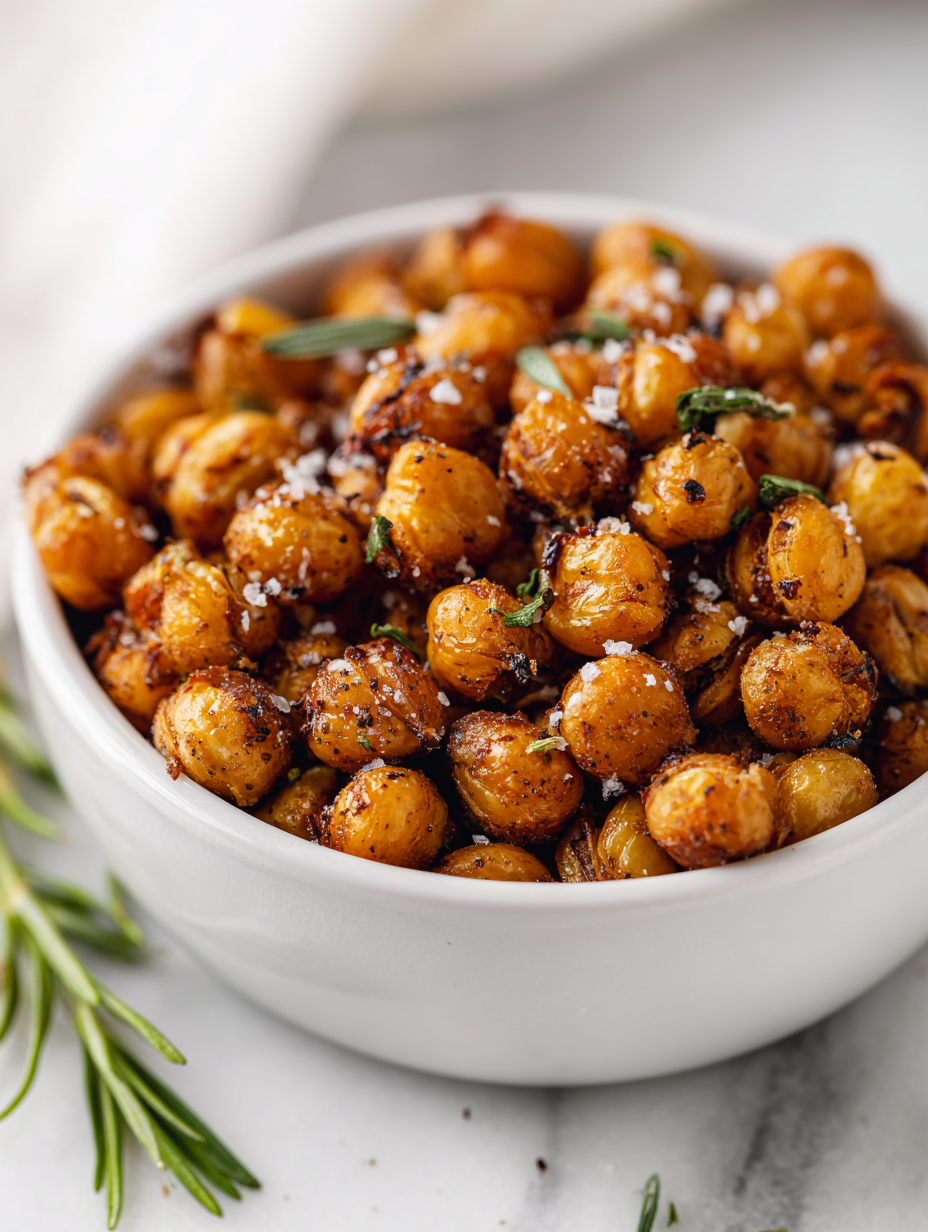
Roasted chickpeas are one of those snacks that sneak up on you with their simple charm. There’s something about the way they crackle in the oven, releasing a smoky, nutty aroma that makes the whole kitchen smell like a cozy café. It’s a humble snack, but when done right, it’s a perfect balance of crunch and savory depth that keeps you reaching back for more.
Honestly, I started making these just to use up a can of chickpeas that was lingering in the pantry. But once you get the hang of roasting them, it’s hard to stop. It’s a messy, honest process—tossing with oil, seasoning, watching for that golden, crackly finish. And yeah, there’s a bit of kitchen chaos, but that’s part of the fun and the payoff when you taste that first, perfectly crisp bite.
Focusing on the overlooked art of balancing crunch and savoriness, this recipe dives into how roasting transforms humble chickpeas into a snack that’s both nostalgic and crave-worthy, with a touch of kitchen chaos that only real cooks understand.
The story behind this recipe
- This recipe was born out of a lazy afternoon when I reached into the pantry and found a can of chickpeas staring back at me. I remember the first time I roasted them—how the smell of toasted spices filled my tiny kitchen, pulling me right into a moment of simple joy. It’s funny how something so humble can become a ritual, a little act of mindfulness amid chaos.
- I started experimenting with different seasonings, trying to capture that perfect balance of smoky, salty, and a hint of heat. Over time, I realized that the key was in the roasting—getting them crispy enough to crackle but not so dark they taste burnt. It’s a messy process, sure, but the reward is worth every burnt batch or overly salty mistake. These chickpeas became my go-to snack—easy, satisfying, and endlessly customizable.
- heading
- story_type
Key ingredients and tips
- Canned chickpeas: I like the firm, meaty texture of canned ones, but drying and roasting dry chickpeas gives an even crunch—try both! The canned are quicker and softer, but roasting dry beans makes for a deeper, nuttier flavor.
- Olive oil: A splash of good extra virgin adds a rich, fruity note that really enhances the chickpeas. If you prefer less fat, skip it, but expect a slightly drier crunch and less golden color.
- Sea salt: I love a hefty pinch for that classic snack saltiness, but you can scale back or swap with smoked salt for a smoky twist. It’s all about balancing that savory punch against the earthy chickpeas.
- Paprika: The smoky depth is my favorite, but smoked paprika can be replaced with chili powder for heat or cumin for warmth. The paprika creates that beautiful, oiled, rust-red hue and adds a subtle, sweet smokiness.
- Garlic powder: I use a generous sprinkle for punch, but if you want a milder flavor, cut back or skip. During roasting, it turns a bit toasty, filling the kitchen with a savory aroma that’s hard to resist.
- Optional seasonings (cayenne, cumin, or rosemary): A pinch of cayenne adds heat, cumin introduces earthiness, and rosemary brings a fresh, herbal sharpness. Mix and match based on mood or pantry stash.
- Sugar (a tiny pinch): I sometimes toss in a smidge to balance the salt and spice—just enough to make your taste buds perk up without turning sweet. It’s a subtle trick for complexity.
Spotlight on key ingredients
Chickpeas:
- Canned chickpeas: I love their soft, meaty bite, but roasting dry ones gives a deeper, nuttier flavor—try both!
- Olive oil: Adds a rich, fruity aroma that makes the chickpeas glossy and crispy—use good quality for best flavor.
Seasonings:
- Paprika: Its smoky sweetness turns the chickpeas a vibrant rust-red and imparts a subtle, oiled aroma during roasting.
- Sea salt: Crucial for that classic snack punch—scaling it up or down adjusts the savoriness without overpowering.
Notes for ingredient swaps
- Canned chickpeas: I like the firm, meaty texture of canned ones, but drying and roasting dry chickpeas gives an even crunch—try both! The canned are quicker and softer, but roasting dry beans makes for a deeper, nuttier flavor.
- Olive oil: A splash of good extra virgin adds a rich, fruity note that really enhances the chickpeas. If you prefer less fat, skip it, but expect a slightly drier crunch and less golden color.
- Sea salt: I love a hefty pinch for that classic snack saltiness, but you can scale back or swap with smoked salt for a smoky twist. It’s all about balancing that savory punch against the earthy chickpeas.
- Paprika: The smoky depth is my favorite, but smoked paprika can be replaced with chili powder for heat or cumin for warmth. The paprika creates that beautiful, oiled, rust-red hue and adds a subtle, sweet smokiness.
- Garlic powder: I use a generous sprinkle for punch, but if you want a milder flavor, cut back or skip. During roasting, it turns a bit toasty, filling the kitchen with a savory aroma that’s hard to resist.
- Optional seasonings (cayenne, cumin, or rosemary): A pinch of cayenne adds heat, cumin introduces earthiness, and rosemary brings a fresh, herbal sharpness. Mix and match based on mood or pantry stash.
- Sugar (a tiny pinch): I sometimes toss in a smidge to balance the salt and spice—just enough to make your taste buds perk up without turning sweet. It’s a subtle trick for complexity.
Equipment & Tools
- Oven: For roasting the chickpeas evenly at high heat.
- Baking sheet: Provides a flat surface for even roasting.
- Parchment paper: Prevents sticking and makes cleanup easier.
- Mixing bowl: Tossing chickpeas with oil and seasonings.
- Measuring spoons: Ensures accurate seasoning.
- Cooling rack (optional): Helps chickpeas cool evenly and stay crispy.
Step-by-step guide to roasting chickpeas
- Preheat your oven to 200°C (390°F). Gather a baking sheet lined with parchment paper and a mixing bowl.
- Drain and rinse a can of chickpeas thoroughly. Pat them dry with a clean towel until no moisture remains—this helps them crisp.
- In the bowl, toss chickpeas with 1-2 tablespoons of olive oil, making sure each one gets a light coating. Add your preferred seasonings—salt, paprika, garlic powder, and a pinch of cayenne if you like heat.
- Spread the seasoned chickpeas evenly on the baking sheet in a single layer. Avoid overcrowding to ensure even roasting.
- Bake for 25-30 minutes, shaking the pan every 10 minutes. Watch for golden, slightly charred edges and listen for that crackling sound—this means they’re crispy.
- Check for doneness: chickpeas should be crunchy, dry-looking, and smell toasted. If they’re still soft or soggy, roast a few more minutes.
- Remove from oven and let cool on the baking sheet for 5-10 minutes. They’ll crisp up further as they cool.
- Once cooled, transfer to a bowl or jar. They’re best enjoyed fresh but can be stored in an airtight container for up to 3 days.
Let the chickpeas cool completely on the sheet before storing or serving. Serve in a bowl, sprinkle with a touch more salt if needed, or toss with fresh herbs for extra flavor.
How to Know It’s Done
- Chickpeas are golden and slightly charred around the edges.
- They crackle when you stir or bite into them, indicating crispness.
- They smell toasted and smoky, not raw or damp.
Roasted Chickpeas Snack
Ingredients
Equipment
Method
- Preheat your oven to 200°C (390°F) and line a baking sheet with parchment paper.
- Drain and rinse a can of chickpeas thoroughly, then pat them dry with a clean towel until no moisture remains; this helps them crisp during roasting.
- Transfer the chickpeas to a mixing bowl, and pour in 1 to 2 tablespoons of olive oil, tossing until all are evenly coated.
- Add the sea salt, paprika, garlic powder, and cayenne pepper to the bowl, then toss again to evenly distribute the seasonings over the chickpeas.
- Spread the seasoned chickpeas in a single layer on the prepared baking sheet, making sure they’re not overcrowded for even roasting.
- Roast in the oven for 25 to 30 minutes, shaking the pan every 10 minutes to promote even browning, until they turn golden and start to crackle.
- Check for doneness: the chickpeas should be crispy, golden, and smell toasted, with a satisfying crackle when you stir or bite into them.
- Remove from the oven and let cool on the baking sheet or a cooling rack for about 5 to 10 minutes to allow them to crisp further.
- Transfer the cooled chickpeas to a bowl or jar, and enjoy immediately or store in an airtight container for up to 3 days to maintain their crunch.
Notes
Pro tips for perfect roasted chickpeas
- Bolded mini-head: Use a high oven temperature to achieve maximum crunch—around 200°C (390°F).
- Bolded mini-head: Ensure chickpeas are thoroughly dried—moisture is the enemy of crispness.
- Bolded mini-head: Shake the pan halfway through roasting—this promotes even browning and crunch.
- Bolded mini-head: Listen for crackling sounds—those are your cue that they’re crispy enough.
- Bolded mini-head: Toss hot chickpeas with seasoning—this helps spices adhere better and enhances flavor.
- Bolded mini-head: Cool completely before storing—otherwise, they’ll steam and lose crunch.
- Bolded mini-head: For extra flavor, add a pinch of smoked paprika or chili powder after roasting—gives a smoky or spicy kick.
Common mistakes and how to fix them
- FORGOT to dry chickpeas thoroughly → They won’t crisp properly if damp.
- DUMPED too much oil → Use just enough to coat without making them greasy.
- OVER-TORCHED chickpeas → Remove early if they smell burnt or look too dark.
- MISSED the seasoning step → Toss while warm for better spice adhesion.
Quick fixes and pantry swaps
- When chickpeas are soggy, splash them with a little extra oil and roast longer.
- If they burn quickly, shield with foil and lower the oven temperature slightly.
- Dumped too much salt? Rinse lightly and dry before roasting again.
- Over-torched? Remove immediately and start with a fresh batch for even crunch.
- When in doubt, add a splash of vinegar or lemon to brighten flavors quickly.
Prep, store, and reheat tips
- Prepping chickpeas: Rinse and thoroughly dry canned chickpeas the day before to ensure maximum crunch during roasting.
- Storage: Keep cooled roasted chickpeas in an airtight container at room temperature for up to 3 days; they stay crispy if kept dry.
- Shelf life: For best texture, consume within 2-3 days. Flavors may mellow or intensify slightly over time.
- Reheating: Recrisp in a 180°C (350°F) oven for 5-7 minutes until crackling resumes. Watch for burning if overdone.
- Sensory notes: Expect a warm, toasted aroma and a satisfying crackle when reheated properly.
Top questions about roasted chickpeas
1. Should I rinse canned chickpeas before roasting?
Yes, rinsing canned chickpeas removes excess salt and reduces the canned flavor, making for a cleaner, nuttier taste after roasting.

2. Can I skip drying the chickpeas?
Absolutely, drying them thoroughly with a towel helps them crisp up better and prevents steaming during baking.
3. What oven temperature is best for roasting chickpeas?
Use a high oven temperature, around 200°C (390°F), to get that perfect crunchy texture without burning them.
4. How long do roasted chickpeas last?
You can store roasted chickpeas in an airtight container at room temperature for up to 3 days. They stay crunchy if kept dry.
5. How do I re-crisp roasted chickpeas?
Reheat in a 180°C (350°F) oven for about 5-7 minutes, until they crackle again and smell toasted.
6. Can I customize the seasonings?
Yes, swapping smoked paprika for regular paprika gives a milder, less smoky flavor, while chili powder adds heat for a spicy kick.
7. Should I add sugar to the seasoning?
Adding a pinch of sugar can balance out the savory, smoky flavors and enhance the overall taste experience.
8. Is it better to use dry or canned chickpeas?
Using dry, unsoaked chickpeas will give a crunchier, nuttier result compared to canned ones.
9. How do I know when chickpeas are done?
Watch for that golden hue and listen for crackling sounds during baking; these indicate perfect crispness.

10. What if my chickpeas burn during roasting?
If they turn too dark or smell burnt, remove them immediately and lower the oven temperature for the next batch.
These roasted chickpeas are more than just a snack—they’re a little reminder that simple ingredients, when treated right, can surprise you with their depth. The aroma of toasted spices and the satisfying crackle make each handful feel like an achievement, even on busy days.
Sharing this recipe is about embracing that messy, honest process—because sometimes the best moments happen when you’re just tossing, roasting, and tasting. It’s a humble, reliable snack that always feels like a small victory, no matter how chaotic the kitchen.