
Making baked corn chips at home isn’t just about snacking; it’s a quiet act of mindfulness. Rolling out the dough, feeling the crunch as you cut each chip, it’s a slow, deliberate process that reconnects you to simple ingredients and honest cooking. In a world that moves too fast, these moments of kneading and shaping bring a sense of calm and purpose.
This recipe is about reclaiming the ritual of snack-making. It’s perfect for those evenings when you want a break from the chaos, a chance to focus on something tangible and grounding. Plus, the smell of toasted corn and spices filling the kitchen is a small reminder that good things take time, even in the simplest form.
Focusing on how making baked corn chips at home can be a mindful, meditative process that reconnects us to simple ingredients and slow cooking in a fast-paced world.
The story behind this recipe
- I first started making baked corn chips after a trip to Mexico, where the smell of corn roasting over open flames stayed with me. I wanted that smoky, slightly charred flavor but in a way that felt more homey and controllable. Baking seemed like the perfect method—less mess, less oil, but still chock-full of that roasted corn aroma.
- One afternoon, I was experimenting with different cornmeal blends and spices. I realized that getting the right crunch and flavor balance wasn’t just about ingredients, but also about patience in baking and how you slice the chips thin enough. It became a ritual—something grounding I could turn to when I needed a break from the whirlwind of everyday life.
- story_type
Key ingredients and tips
- Yellow cornmeal: I love how it gives the chips a hearty, slightly sweet flavor; skip it for a finer texture if you prefer crispness over rustic charm.
- Salt: I always add a bit more than I think I need—brings out the natural corn flavor and makes the chips pop, but taste as you go to avoid over-salting.
- Olive oil: It’s my go-to for a gentle, fruity richness that crisps up nicely; swap with avocado oil for a subtler flavor, but keep the heat moderate.
- Water: I use warm water to help the dough come together smoothly; cold water might lead to a tougher texture, so stick to warm for ease and softness.
- Spices (paprika, cumin): I love a smoky kick, but if I want milder chips, I skip the spice or go light—these are customizable to your flavor mood.
- Corn husks (for wrapping): I use them to keep the chips moist while baking, but if you don’t have any, a damp towel works just as well.
- Optional seeds (sesame, flax): I sprinkle these on before baking for crunch and visual appeal, but they can be omitted if you prefer a cleaner look and taste.
Spotlight on key ingredients
Cornmeal:
- Yellow cornmeal: I love how it gives the chips a hearty, slightly sweet flavor; skip it for a finer texture if you prefer crispness over rustic charm.
- Salt: I always add a bit more than I think I need—brings out the natural corn flavor and makes the chips pop, but taste as you go to avoid over-salting.
- Olive oil: It’s my go-to for a gentle, fruity richness that crisps up nicely; swap with avocado oil for a subtler flavor, but keep the heat moderate.
Spices and Seeds:
- Spices (paprika, cumin): I love a smoky kick, but if I want milder chips, I skip the spice or go light—these are customizable to your flavor mood.
- Water: I use warm water to help the dough come together smoothly; cold water might lead to a tougher texture, so stick to warm for ease and softness.
- Optional seeds (sesame, flax): I sprinkle these on before baking for crunch and visual appeal, but they can be omitted if you prefer a cleaner look and taste.
Notes for ingredient swaps
- Dairy-Free: Swap butter for coconut oil or a neutral oil like grapeseed—still crisp, but with a subtler flavor.
- Gluten-Free: Use a fine-ground gluten-free cornmeal blend—watch for grittiness, aim for a smooth dough.
- Lower Sodium: Reduce salt to 1/4 teaspoon or use a salt substitute—chips will still have good flavor, just less punch.
- Extra Spicy: Add cayenne or chili powder instead of paprika—be mindful of heat levels, taste as you go.
- Oily Texture: Use less oil or a lighter oil like avocado—chips might be slightly less crispy but still flavorful.
- Herb Variations: Mix in dried herbs like oregano or thyme—adds aroma, but may alter the traditional corn flavor.
- Sweet Version: Incorporate a touch of cinnamon and sugar—turns snack into a mild, sweet treat.
Equipment & Tools
- Rolling pin: To roll out the dough evenly thin.
- Sharp knife or pizza cutter: To cut the dough into chips cleanly.
- Baking sheet: To bake the chips evenly.
- Parchment paper: To prevent sticking and facilitate easy removal.
Step-by-step guide to baked corn chips
- Gather your equipment: a rolling pin, a sharp knife or pizza cutter, a baking sheet, and parchment paper. Preheat your oven to 180°C (350°F).
- In a mixing bowl, combine 1 cup of fine cornmeal, 1/2 teaspoon of salt, and 1/4 teaspoon of smoked paprika for depth.
- Add 2 tablespoons of olive oil and 1/3 cup of warm water to the dry ingredients. Mix until it forms a smooth, pliable dough. If too sticky, sprinkle in a bit more cornmeal; if too dry, add a tiny splash more water.
- Divide the dough into two parts. Place one on a piece of parchment paper, cover with a second sheet, and roll out as thin as possible—about 1/8 inch. Aim for even thickness for uniform crispness.
- Peel away the top parchment sheet and cut the dough into small triangles or strips, whatever shape you prefer. Use a sharp knife or pizza cutter for clean edges.
- Transfer the cut chips onto a baking sheet lined with parchment. Space them out so they don’t overlap. Lightly brush or spray with a little more olive oil for extra crunch.
- Bake in the oven for 12-15 minutes. Keep an eye on them after 10 minutes; they should be golden and crisp around the edges. If they’re browning too quickly, lower the temperature slightly.
- Once baked, remove from oven and let rest on a wire rack for 5 minutes. They will continue to crisp up as they cool. Sprinkle with a pinch more salt if desired.
- Serve immediately or store in an airtight container for up to 2 days. For extra crispiness, reheat in the oven at 150°C (300°F) for 3-5 minutes, until crackling and fragrant.
Allow the chips to rest on a wire rack for 5 minutes after baking. Serve warm or at room temperature for best crunch. Store in an airtight container, reheating briefly if needed.
How to Know It’s Done
- Chips are uniformly golden and crisp, not pale or soggy.
- They crackle when broken, indicating good crunch.
- Edges are slightly darker but not burnt, with a smoky aroma.
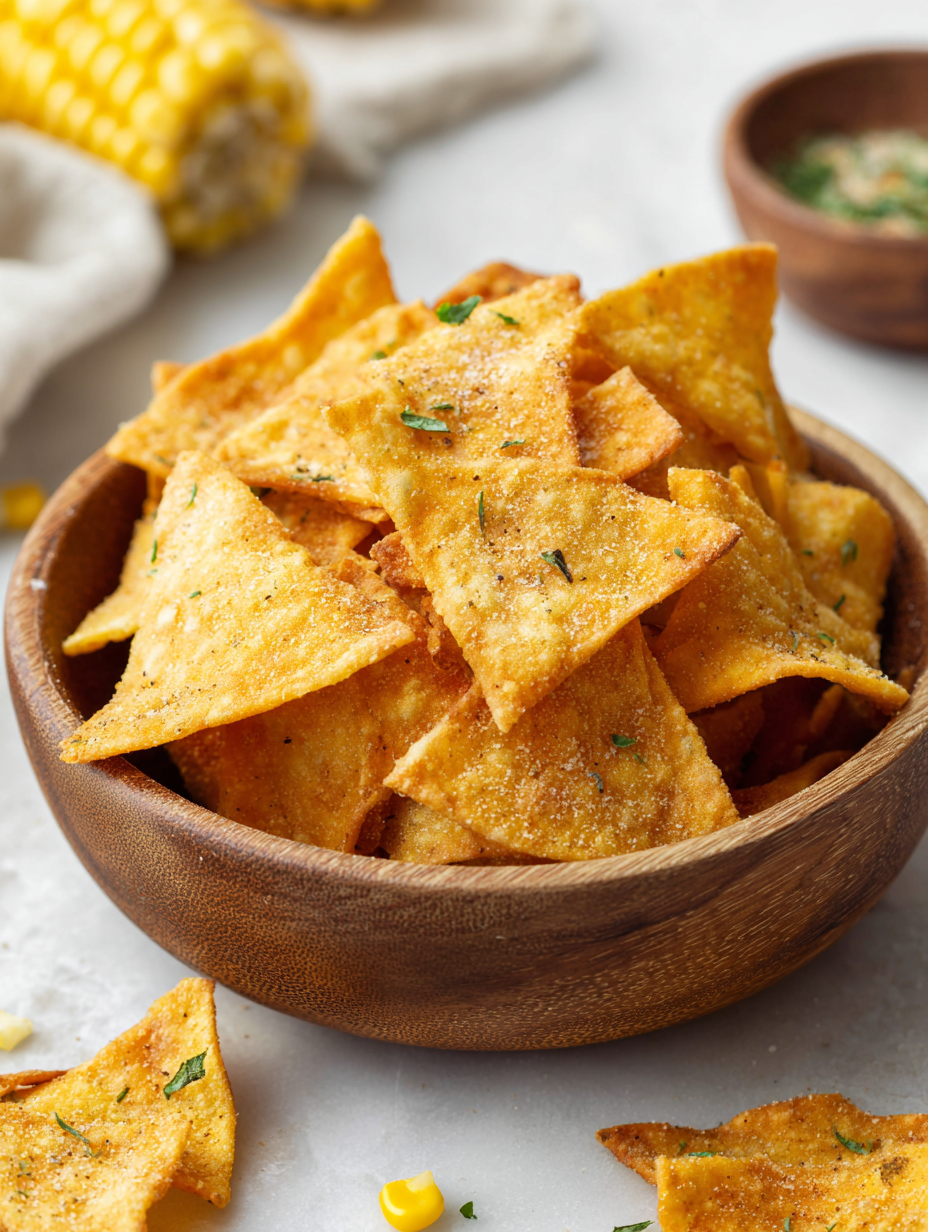
Homemade Baked Corn Chips
Ingredients
Equipment
Method
- Mix the cornmeal, salt, and paprika in a bowl until well combined, creating an even, fragrant dry mixture.
- Pour in the olive oil and warm water, then stir with a spoon or your hands until a smooth, pliable dough forms that’s not sticky but holds together easily.
- Divide the dough into two equal parts to make rolling easier, then place one portion between two sheets of parchment paper.
- Using a rolling pin, roll out the dough as thin as possible—about 1/8 inch—aiming for an even thickness across the surface.
- Carefully peel away the top parchment layer and use a sharp knife or pizza cutter to cut the dough into small triangles or strips, creating uniform shapes for even baking.
- Transfer the cut chips onto a baking sheet lined with parchment paper, spacing them out so they don’t touch—this helps them bake evenly and crisp up nicely.
- Lightly brush or spray the chips with a little more olive oil for a shiny, crispy finish, then repeat the rolling and cutting process with the second dough portion.
- Bake the chips in a preheated oven at 180°C (350°F) for 12-15 minutes, keeping a close eye after 10 minutes—look for golden edges and a fragrant toasted aroma.
- Once they’re crisp and golden, remove the chips from the oven and let them rest on a wire rack for about 5 minutes to finish crisping up.
- Serve the baked corn chips warm or at room temperature, enjoying their rustic texture and smoky aroma. Store any leftovers in an airtight container for up to 2 days, reheating briefly if needed for extra crunch.
Pro tips for perfect baked chips
- Bolded mini-head: Use a sharp knife or pizza cutter for clean, even cuts—crisper chips depend on uniform shapes.
- Bolded mini-head: Roll the dough as thin as possible—aim for about 1/8 inch—to maximize crunch and minimize baking time.
- Bolded mini-head: Keep an eye on the chips in the last few minutes—they can go from perfect to burnt quickly, around 12-15 minutes at 180°C (350°F).
- Bolded mini-head: Lightly brush or spray with oil before baking—this helps achieve a golden, crisp texture with a shiny finish.
- Bolded mini-head: For extra flavor, sprinkle your spices or seeds on just before baking—this keeps them from burning and retains aroma.
- Bolded mini-head: If chips are not crisp enough after cooling, return to oven at 150°C (300°F) for 3-5 minutes—rescue that crunch.
- Bolded mini-head: Use parchment paper to prevent sticking and ensure easy removal—less fuss and cleaner baking sheets.
Common mistakes and how to fix them
- FORGOT to preheat the oven → Always preheat for even baking and crispness.
- DUMPED dough too thick → Roll thinner for crunchier chips, aim for 1/8 inch thickness.
- OVER-TORCHED edges → Remove chips once golden brown, not dark, to avoid bitterness.
- FAILED to cut evenly → Use a ruler or guide for uniform shapes, ensuring even baking.
Fast fixes for perfect chips
- If chips are soggy, splash with a little more oil and bake 2 minutes longer until shimmer appears.
- When chips stick, patch with a quick spray of oil and a gentle nudge on the baking sheet.
- Splash with lemon juice if chips taste flat—brightens flavor instantly.
- DUMPED dough too thick? Rescue by rolling thinner or adding a tiny splash of water to soften.
- When chips burn at edges, shield with foil after 10 minutes to prevent over-torching.
Prep, store, and reheat tips
- Prep the dough up to a day in advance; wrap tightly and refrigerate to maintain freshness and prevent drying out.
- Store baked chips in an airtight container at room temperature for up to 2 days; they will gradually lose crispness but can be re-crisped in the oven.
- For longer storage, freeze the cooled chips in a sealed bag for up to a month; reheat at 150°C (300°F) until crackling, about 3-5 minutes.
- Reheating chips enhances their crunch and aroma; watch carefully to avoid burning, and listen for that satisfying crackle.
- Keep an eye on texture and scent—chips should smell toasted and stay crisp, not soggy or dull.
Top questions about baked corn chips
1. How do I know when baked corn chips are done?
Look for chips that are evenly golden and crisp, not pale or soggy, and listen for a crackling sound when broken.
2. What texture should baked corn chips have?
They should be golden around the edges, firm to the touch, and crackle when broken. A slight smell of toasted corn is a good sign.
3. How thin should I roll out the dough?
Use a sharp knife or pizza cutter to get clean, even cuts. Thinner slices bake more evenly and are crunchier.
4. How long should I bake the chips?
Bake at 180°C (350°F) for about 12-15 minutes. Keep an eye after 10 minutes to prevent over-browning.
5. How should I store baked corn chips?
Store in an airtight container at room temperature for up to 2 days. Reheat at 150°C (300°F) for a few minutes to restore crunch.
6. Can I substitute oils in the recipe?
Yes, you can swap olive oil for avocado or neutral oils like grapeseed. The flavor will be milder but still crisp.
7. Can I customize the spices?
You can use different spices like chili powder or cumin for varied flavor. Adjust to your taste, but keep the spices light to avoid burning.
8. What type of cornmeal works best?
Using a fine cornmeal blend helps achieve a smoother dough and crisper chips. Avoid gritty textures by choosing finely ground cornmeal.
9. What if my chips are not crispy enough?
If chips are soggy after baking, spray with a little more oil and bake for 2 more minutes until shimmer and crackle return.

10. Why is preheating important?
Always preheat your oven first to ensure even baking and crispness. It’s a small step that makes a big difference.
Making these baked corn chips brings a quiet satisfaction that’s hard to find in store-bought snacks. The aroma of toasted corn and spices, the crisp snap with every bite, it all feels honest and grounding. In a world full of quick fixes, these chips remind me that good things—simple, crunchy, flavorful—take a little time and care.
They’re perfect for sharing, but honestly, I find myself reaching for them straight from the tray, still warm and fragrant. There’s something about the slow process and the resulting crunch that makes the snack feel a little more special—like a small act of mindfulness in an otherwise hectic day.