
There’s something about roasting chickpeas that turns an ordinary legume into a snack that’s almost addictive. The magic happens in the oven, where heat transforms their firm texture into something crisp and slightly smoky, with a flavor that’s deeply nutty and satisfying. It’s a simple process, but it’s the kind of transformation that makes you want to keep coming back for more, whether as a snack or a crunchy topping for salads and bowls.
I’ve always loved how roasting nuts and seeds brings out their best qualities, and chickpeas are no different. They’re budget-friendly, versatile, and surprisingly easy to prepare. Plus, the aroma that fills the kitchen while they roast—warm, toasty, with hints of caramel—just makes the whole house smell like comfort. Once you get the hang of it, it’s a quick way to elevate a humble ingredient into something special.
This recipe isn’t about complicated techniques or fancy ingredients; it’s about turning simplicity into something crave-worthy. I find that the key lies in the right balance of seasoning and patience during roasting. It’s a process of slow transformation, where patience rewards you with a snack that’s crunchy, smoky, and just a little addictive—perfect for those moments when you need a quick, wholesome bite.
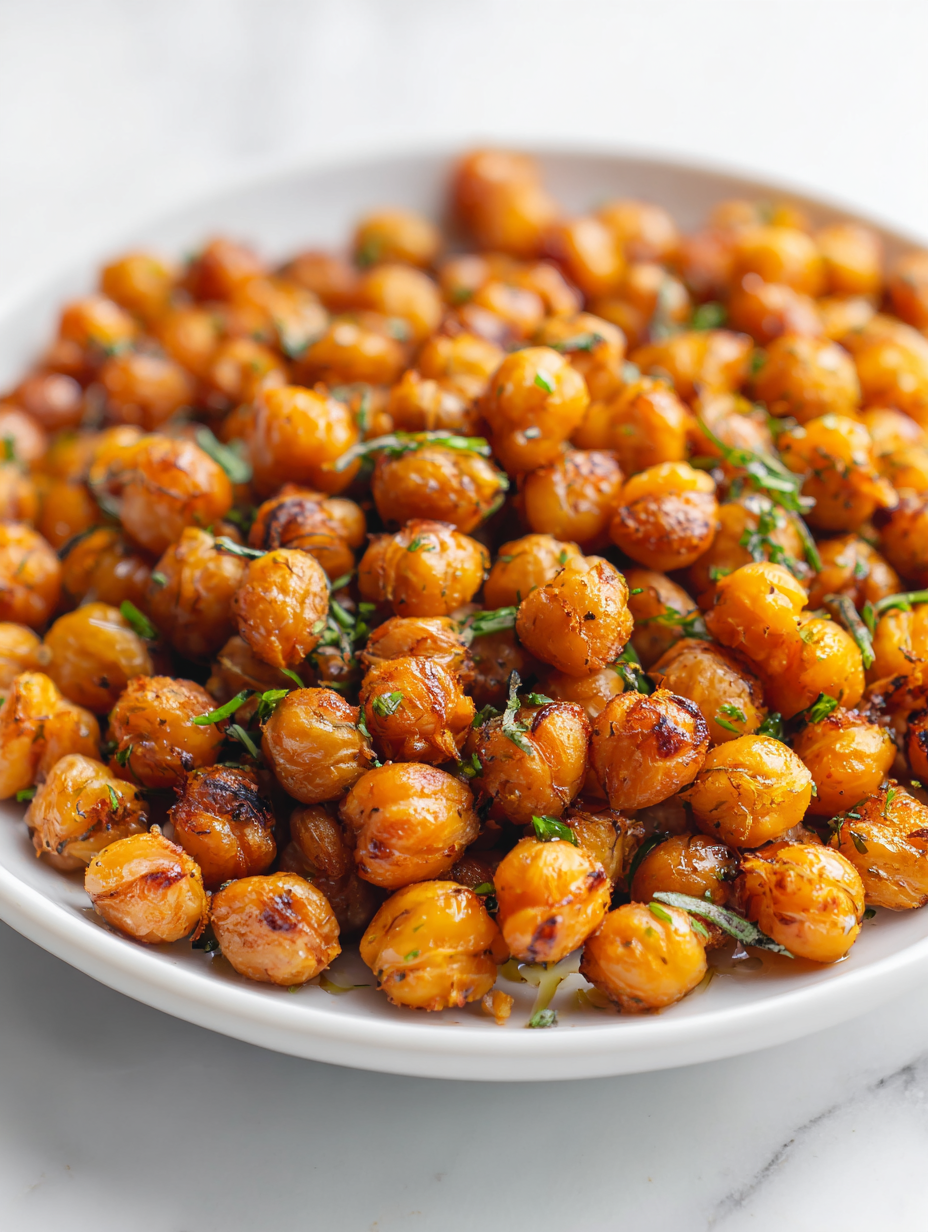
Focusing on how roasting chickpeas transforms their texture and flavor, making them irresistibly crispy and smoky, perfect for snacking or adding crunch to salads.
The story behind this recipe
- I first started roasting chickpeas during a chaotic week when I needed a quick snack that was both satisfying and wholesome. The smell of toasted beans, with their slightly caramelized edges and smoky aroma, took me right back to childhood trips to the coast, where simple snacks felt like treasures. That moment made me realize how much flavor a little heat and patience can coax out of humble ingredients.
- Since then, roasting chickpeas has become my go-to for whenever I need a break from overly processed snacks. It’s a tactile, almost meditative process—watching them turn from dull beige to golden, crispy bites. And honestly, nothing beats the satisfying crackle as I pop one into my mouth, the smoky, nutty flavor lingering long after.
- heading: ‘The story behind this recipe’
Ingredient breakdown: key components
- Canned chickpeas: I like the convenience, but drying them thoroughly before roasting makes them extra crispy—damp beans steam and turn soft, so pat them dry with a clean towel.
- Olive oil: A little oil helps with even roasting and adds a subtle richness; just a teaspoon is enough—overdoing it can make them greasy and less crispy.
- Salt: I prefer flaky sea salt for that satisfying crunch and burst of flavor—finer salt melts into the beans, so crush a bit for more punch.
- Smoked paprika: It gives that deep, smoky aroma I crave—if you want more heat, toss in a pinch of cayenne, but start small.
- Garlic powder: Adds a savory kick without the moisture; avoid too much to prevent burning during roasting—light dusting is best.
- Optional seasonings: I sometimes sprinkle cumin or a dash of chili powder—experiment to match your mood, but keep it balanced so it doesn’t overpower the beans’ natural nuttiness.
- Sugar (a pinch): I like to sprinkle a tiny bit for caramelization—just enough to enhance the smoky sweetness, but don’t go overboard or they’ll burn.
Spotlight on key ingredients
Canned chickpeas:
- I love how they’re always ready, but drying them thoroughly before roasting makes them extra crispy—damp beans steam and turn soft, so pat them dry with a clean towel.
- Olive oil: A little oil helps with even roasting and adds a subtle richness; just a teaspoon is enough—overdoing it can make them greasy and less crispy.
Spices and seasonings:
- Smoked paprika: It gives that deep, smoky aroma I crave—if you want more heat, toss in a pinch of cayenne, but start small.
- Salt: I prefer flaky sea salt for that satisfying crunch and burst of flavor—finer salt melts into the beans, so crush a bit for more punch.
Notes for ingredient swaps
- Dairy-Free: Olive oil works perfectly, but if you want a nuttier flavor, try sesame or avocado oil—just a splash adds richness.
- Low-Sodium: Use less salt or experiment with herbs and spices; your chickpeas won’t miss the salt as much as you think.
- Spice Variations: Swap smoked paprika for chipotle powder for a deeper smoky heat; cumin adds earthiness without heat.
- Sweeteners: A drizzle of honey or maple syrup before roasting gives a caramel glaze—just watch for burning, keep it light.
- Legume Swap: Use roasted fava beans or lentils for a different crunch and flavor profile—same roasting process, different vibe.
- Salt Type: Flaky sea salt adds crunch, but if you only have table salt, crush it slightly for better distribution.
- Seasoning Boost: Add a pinch of curry powder or za’atar for an aromatic twist—start small, build flavor gradually.
Equipment & Tools
- Baking sheet with sides: To hold the chickpeas and prevent rolling during roasting.
- Kitchen towel: To thoroughly dry the chickpeas for maximum crispness.
- Mixing bowl: To toss the chickpeas with oil and seasonings evenly.
- Measuring spoons: To accurately measure oil and seasonings.
Step-by-step roasting guide
- Preheat your oven to 200°C (390°F). Use a large baking sheet with sides, so the chickpeas roast evenly and don’t roll off.
- Drain and rinse a can of chickpeas. Pat them very dry with a clean towel—any moisture will steam and prevent crisping.
- In a mixing bowl, toss the dry chickpeas with 1 teaspoon of olive oil, ensuring they’re coated but not greasy.
- Add 1 teaspoon of flaky sea salt, ½ teaspoon smoked paprika, and a pinch of garlic powder. Toss again to coat evenly.
- Spread chickpeas in a single layer on the baking sheet. Shake gently to distribute evenly, avoiding overcrowding.
- Roast for 20-25 minutes, stirring once halfway through. Keep an ear out for crackling and smell that toasted aroma. They should turn golden and slightly puffed.
- Check for doneness: the chickpeas should be crispy, with a firm bite and a smoky aroma. If they’re still soft, roast for another 5 minutes.
- Remove from oven. Let them cool on the baking sheet for 5 minutes—this helps them crisp up further.
- Taste and adjust seasoning if needed. Serve warm or at room temperature, enjoying that satisfying crunch and smoky flavor.
Let the chickpeas cool on the baking sheet for 5 minutes to crisp up further. Serve in a bowl or jar, perfect for snacking or topping salads. Store any leftovers in an airtight container at room temperature for up to 3 days.
How to Know It’s Done
- Chickpeas are golden and crispy, with a crackling sound when shaken.
- A fragrant, smoky aroma fills the kitchen, signaling proper roasting.
- The beans feel firm and dry, not damp or soft, indicating they’re ready.
Crispy Roasted Chickpeas
Ingredients
Equipment
Method
- Preheat your oven to 200°C (390°F) and line a baking sheet with sides to prevent rolling.
- Drain and rinse the chickpeas, then thoroughly pat them dry with a clean kitchen towel until no moisture remains—this helps achieve maximum crunch.
- In a mixing bowl, toss the dried chickpeas with a teaspoon of olive oil, ensuring they’re lightly coated all over.
- Add the crushed sea salt, smoked paprika, garlic powder, and a pinch of sugar to the bowl. Toss everything together until the chickpeas are evenly coated with the seasonings.
- Spread the seasoned chickpeas in a single layer on the prepared baking sheet, making sure they’re not crowded—this allows for even roasting.
- Roast the chickpeas for 20-25 minutes, stirring once halfway through, until they turn golden and crispy, filling your kitchen with a warm, toasty aroma.
- Check for doneness: the chickpeas should feel firm and dry, with a satisfying crackle when shaken, and smell deeply smoky and nutty.
- Remove from the oven and let them cool on the baking sheet for about 5 minutes to crisp up further.
- Taste and adjust seasoning if needed, then transfer to a bowl. Enjoy these crunchy, smoky chickpeas as a snack or topping.
Notes
Pro tips for perfect roasted chickpeas
- Bold seasoning: Mix your spices thoroughly so every chickpea gets a smoky, flavorful coat—no bland bites.
- Even spread: Use a baking sheet with sides and spread chickpeas in a single layer for uniform crispiness.
- Dry thoroughly: Pat chickpeas dry with a towel before roasting; moisture causes soggy spots and uneven crunch.
- Watch the spice: Add paprika or chili halfway through roasting to prevent burning and bitterness.
- Cool before storing: Let roasted chickpeas cool completely on the baking sheet to crisp up further and avoid condensation.
- Use a light hand: Toss with just enough oil—too much can make them greasy, too little may prevent crisping.
- Stir during roasting: Shake or stir the chickpeas halfway through to promote even browning and prevent burning.
Common mistakes and how to fix them
- FORGOT to dry chickpeas thoroughly → Damped beans steam, prevent by patting dry.
- DUMPED oil or seasoning → Use measured amounts for even roasting and flavor.
- OVER-TORCHED spices → Add spices halfway to avoid burning and bitterness.
- UNDER-ROASTED chickpeas → Roast longer until crispy and golden, avoid sogginess.
Quick fixes and pantry swaps
- When chickpeas seem dull, splash a pinch more salt or paprika to brighten flavor.
- If beans stick or burn, shield with foil or reduce oven temperature by 10°C (20°F).
- DUMPED seasoning? Toss again with a little oil and spices for even coverage.
- When chickpeas aren’t crispy enough, rescue with a quick 5-minute blast at 220°C (430°F).
- Pantry swap: Use toasted sesame seeds instead of salt for a nutty crunch and flavor boost.
Prep, store, and reheat tips
- Prepare the chickpeas by thoroughly drying them after rinsing; this ensures maximum crispness during roasting.
- Store cooled roasted chickpeas in an airtight container at room temperature for up to 3 days; they stay crispy and flavorful.
- If making in advance, keep them away from moisture to prevent sogginess; adding a small silica packet can help.
- Reheat briefly in a 180°C (350°F) oven for 5-7 minutes until warm and crunchy again, listening for that satisfying crackle.
- For longer storage, freeze roasted chickpeas in a sealed bag for up to a month; re-crisp in the oven straight from frozen.
Top questions about roasted chickpeas
1. Should I soak chickpeas before roasting?

Yes, soaking chickpeas overnight can make them softer, but for roasting, dry and drained beans work best for crunch.
2. Can I use dried chickpeas instead of canned?
Use canned chickpeas for convenience, but drying them thoroughly is key to achieving crispy texture.
3. Can I season chickpeas before roasting?
Yes, you can add spices before roasting, but adding some halfway through prevents burning and keeps flavors vibrant.
4. How should I store roasted chickpeas?
Store roasted chickpeas in an airtight container at room temperature for up to 3 days; keep away from humidity.
5. Can I reheat roasted chickpeas?

Reheat in a 180°C (350°F) oven for 5-7 minutes until they crackle again, restoring some crispness.
6. How do I prevent burning the spices?
Over-roasting can burn spices and make chickpeas bitter. Keep an eye on them after 20 minutes and stir.
7. What if my chickpeas are not crispy enough?
If chickpeas are soggy, spread them out more and roast a few extra minutes until crispy and golden.
8. What salt is best for roasting chickpeas?
Use flaky sea salt for best crunch and flavor. If you only have fine salt, crush it slightly before sprinkling.
9. Can I add sugar to roasted chickpeas?

Adding a pinch of sugar before roasting can enhance caramelization, giving a slightly sweet, smoky flavor.
10. Can I customize the seasonings?
Yes, you can customize seasonings—try cumin, chili powder, or curry powder for different flavor profiles.
Roasted chickpeas are such a humble snack, but their smoky crunch feels like a small victory every time. I keep coming back to this recipe when I want something satisfying without fuss, especially during busy weeks. The smell of toasted beans filling the kitchen is a reminder that good things often come from simple steps.
Whenever I make these, I think about how a little heat and patience can turn dried legumes into a snack that feels almost indulgent. They’re perfect for adding a crunch to salads or just grazing straight from the jar. It’s a small, easy pleasure that keeps me coming back, no matter the season.